Do you have any problem while accessing data on your Lacei external hard drive, well don't panic all your precious data can be restored using Lacie data recovery software. Many computer users like to have external hard drives to store data like movies, songs, office documents. They can easily transfer their data from one system to another. Lacie is very popular among them due to its high quality and reliability. But sometimes data can be inaccessible to the user or it get lost. There are several reasons for data loss from your lacie hard disk. The file system can get corrupted due to formatting errors or virus infection on lacie device. Abrupt power failure or system shut down while writing data. Accidental deletion of data. Errors like drive corruption, re-partitioning error while file system conversion may cause data loss. Corruption of Volume header block can also be a reason for data loss. Mounted image can also give error while un mounting it.Use of unauthorized third party application to create or delete partition also lead to loss of valuable data
 |  |
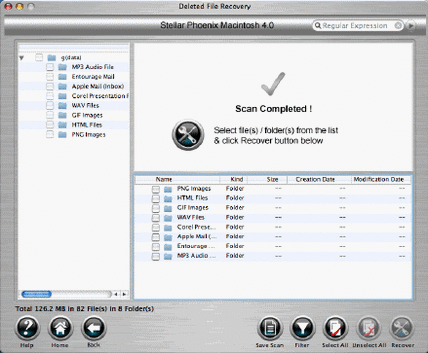
If you have backed up your data then there is no problem other wise Lacie data recovery software will certainly recover your data from your lacie hard disk. It is a powerful and reliable tool which will restore lost corrupted or deleted data. By following simple steps you will be able to complete this process. It has advance algorithm that will scan fast through all the partitions.It will get all the possibly recoverable file in the preview list and you can choose from it. The marked files will be recovered without any difficulty. You can download Lacie data recovery software from the Internet and see its potential how efficiently it can ease your life from tension of data loss.
Lacie data recovery software user guide
Step 1 : Download the softwareonline and install it on your system
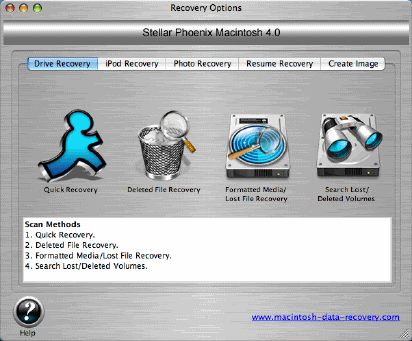
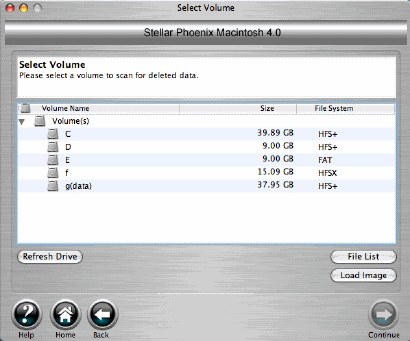
Step 2: Select the corrupted drive/drives to be recovered
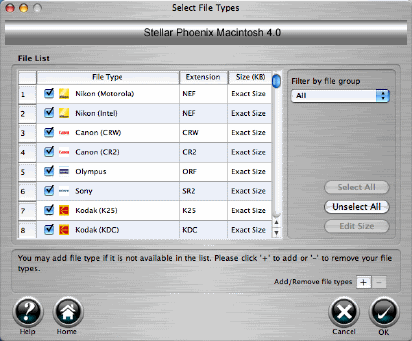
Step 3: Choose the file types and mark the desired files to be restored
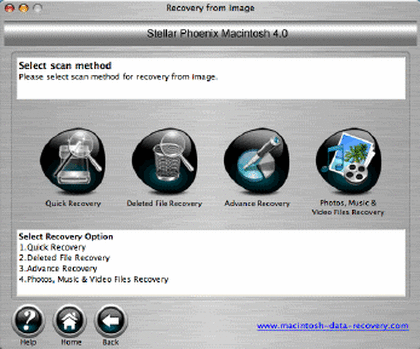
Step 4: Click the scan button to start the scanning process
Step 5 : Choose the path where you wat to store the recovered file
 |  |
 RSS Feed