Entourage is an excellent email client application that is available to manage your emails, calender entries, notes and journals on Mac system. It helps to transfer in important documents and media contents through attachments for your office and business purposes. These entourage files are really crucial and should be backed up to prevent any data loss situation. Mac also provides an in built back up application called Time Machine backup. It stores a back up of files at regular interval of time in a separate file and restore them whenever you face any data loss situation. But what if the time machine fails to provide backup then the question arises how to restore entourage file after time machine backup fails. Here you will get an effective solution by which you can recover entourage files.

|

|
Causes of Lost or inaccessible Entourage file -
- Sudden system termination while Entourage is operational.
- Any network error while transferring files.
- Unknown entourage application error.
- Virus or malware infection.
- Accidentally deleting any system files related to the application.
As seen you can not rely on Time machine backup, either you have to be ready with another backup facility or you have to restore entourage files by other means like using Entourage Recovery Software. The software is highly effective in recovering lost, deleted and corrupted entourage files. It has a very user friendly interface that is self explanatory which will guide you to few simple steps of the process. It will scan your drives and provide you the preview of the files it can restore. You can choose them and also can specify the location where you want to save these files. There is also a Demo version available where you can see its efficiency till the preview step but for restoring the Entourage files you have register online. You can download and see how it works wonderfully to restore entourage file after time machine backup fails.
Mac Entourage Recovery Software User Guide
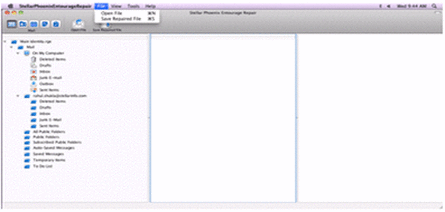
Step 1 - Download and install the software on your Mac system.
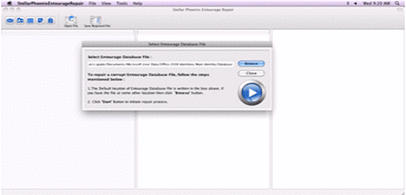
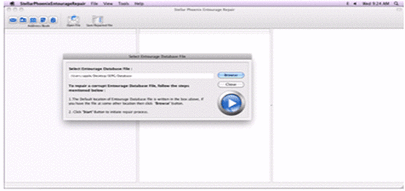
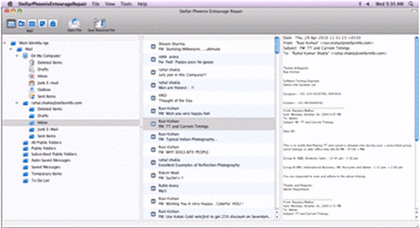
Step 2 -Select the database you want to recover.
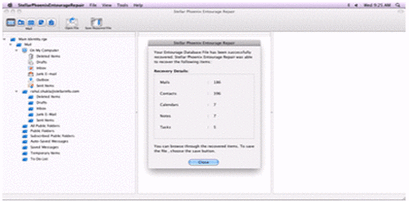
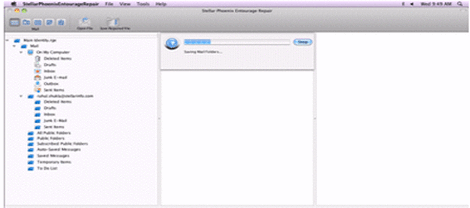
Step 3 - you can see the summary after the scanning is complete.
Step 4 - Now you will get the RGE files in the Preview.l
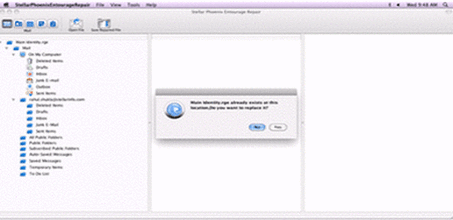
Step 5 - you have to click save repair from the menu.
Step 6 - Select the location where you want to save the recovered files.
Step 7 - You can even stop the process by clicking the stop button.
|
|
|